
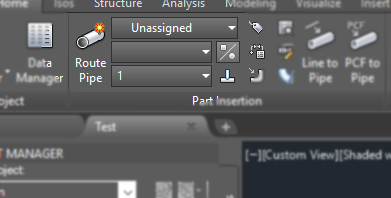
For the straight cable trays (sleeves) it is a must to enter "Custom" value to the component designation in the Spec Editor’s spec editor tab to allow the editing inside Plant3D. Otherwise they are not changeable; they are "Standard" parts.
@ 9:30 I am showing this step.
Be aware that the these tables are cAsE sensitive. Therefore strictly use "Custom", like this:

@ 9:30 I am showing this step.
Be aware that the these tables are cAsE sensitive. Therefore strictly use "Custom", like this:
Related with the first FAQ point:
The thing is that Plant3d is generating the descriptions when you place the parts. If you place a part which is 'standard' this is not a problem (for example for bends or tees). You can change the size (width), and the description will change with it.
However if you place a 'custom' part in the model, the description is generated. But after this you are allowed to edit the dimensions of the part in the properties tab. At this point you can change whatever you like. This cannot be easily followed by the descriptions (short or long), so Autodesk decided, that if you place a custom part (like our straight cable trays), you should not change the size (150 or 300 or whatever) and the description will not change either.
So my workflow using Python Cable Tray is that every time I place a straight cable tray I only change the length afterwards. The only purpose of setting the straight cable trays to 'Custom' is to allow custom lengths. Hence if I want to change the width of a straight cable tray I simply delete this existing one and place a new one with the right width and adjust the length afterwards. Unfortunately this is a limitation in the program.
Same answer as for above (2.) FAQ point.
Because of the limitation described above, by default none of the descriptions contains information regarding the length of the cable trays.
I have one more-or-less easy workaround:
Export the sleeves’ (straight cable tray’s) info to an excel sheet from the Data Manager and use the below table’s coloured cells (AY-BC columns) to calculate the actual lengths:
https://goo.gl/SdFKM2
Full method here:
Export the sleeves’ (straight cable tray’s) info to an excel sheet from the Data Manager and use the below table’s coloured cells (AY-BC columns) to calculate the actual lengths:
https://goo.gl/SdFKM2
Full method here:
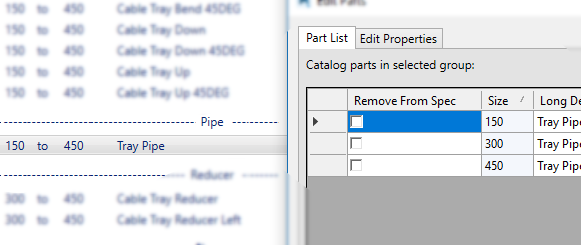
It is because you have not added any pipe to your cable tray spec sheet and Plant3D is offering the spec's available sizes based on the pipe-availability.
So to solve this just go to the Spec Editor and add a pipe to your cable tray spec with the proper diameter parameters and you should be good to go, like this:
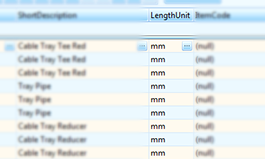
Make sure the unit is correct. Because it is possible when you created the new part you did not choose correct dimensional unit (imperial or metric). Moreover please take into consideration that if you copy a metric part it will be always metric.
 However there is one mode to change this length unit later: using a database editor. If you open the catalog file with a database editor (SQLite Expert for example), you can change this value any time. However, make sure you make a backup of your catalog beforehand! Here is my post regarding some database editing.
However there is one mode to change this length unit later: using a database editor. If you open the catalog file with a database editor (SQLite Expert for example), you can change this value any time. However, make sure you make a backup of your catalog beforehand! Here is my post regarding some database editing.
Most probably it means that one of the parameters’ value is generating the error. For example if the plate thickness (TH) is greater than the overall width of the cable tray (C1) it is generating an error. Of course it is an extreme example. But something similar is behind the error.
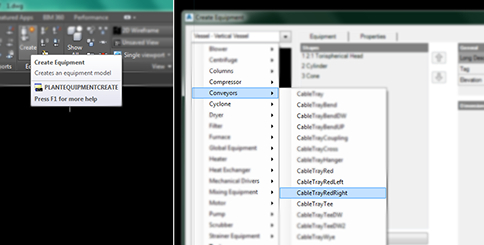
If I am having a problem like this I usually use the equipment creation in Plant3D to check what is causing the problem, as you can see in details in the following FAQ (8.) point.
If I am having a problem like this I usually use the equipment creation in Plant3D to check what is causing the problem, as you can see in details in the following FAQ (8.) point.
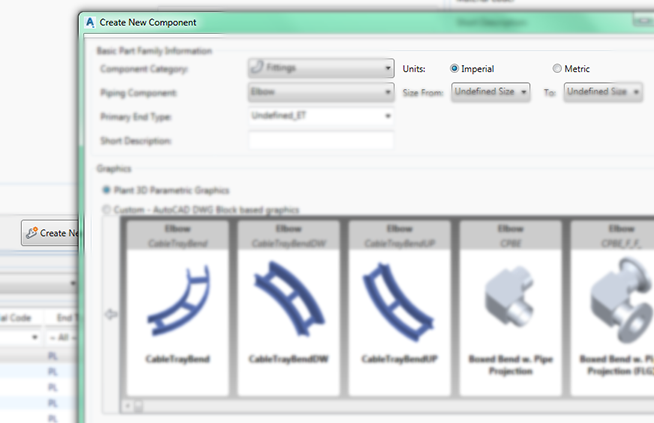
When you purchase any of my apps, you will receive all scripts, which can be used in two ways. First is the mostly used method: creating new items in the Spec Editor and inserting these into the 3D-model while using catalog and spec sheet files.
The other method is the equipment creation. You can create equipment with these scripts. So for example if you have my cable tray app, you can create all the cable tray items in the Spec Editor, but all these cable trays are also available as equipment (under the Conveyors section). Why it is useful? Because you can test your parameters very fast. If you are not sure what should be the correct value of some parameters it is significantly more convenient to test it like this.
The other method is changing a parameter in the Spec Editor, then updating your spec-sheet, then going back to Plant3D, then refreshing the spec there and finally inserting your item that has now an updated parameter that is hopefully what you were looking for. Because if not, you have to start all over again. While if you create an equipment with the same script, you can test all the parameters instantly.
Unfortunately it is not.