
I have created a basics guide video from the very creation of a new project to reaching a point where you can start putting the cable trays into your 3D model-space.
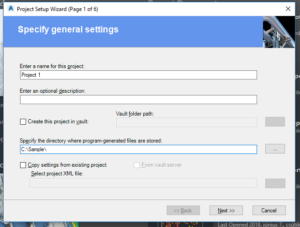
To reach this point you need to create a new project in Plant3D at first, if you have not done it already. You can create metric projects or imperial as well. My app works in both cases. For a little bit easier creation you can also copy the settings of a previously created project as well. But in this case the measurement settings cannot be changed.
Now you can create your first drawing inside the program. But at the moment you can only route pipes. Because only pipe routing specs are available in the project. You have to create a new spec to use for the cable trays.

So after opening the spec editor, you can create a new spec. This file should be located inside your project’s Spec Sheets folder. After you add elements to the spec file from any catalog, they will be available in the Plant3D dynamic tool palette. So adding cable tray elements from the sample catalog will result in using the sample cable tray pieces in your new project.
After going back to Plant3D and selecting the newly created spec of yours you can start drawing your cable trays.
Two tips to remember:
- Do not forget to add “Custom” to the straight cable tray, otherwise you cannot change its length in the properties tab.

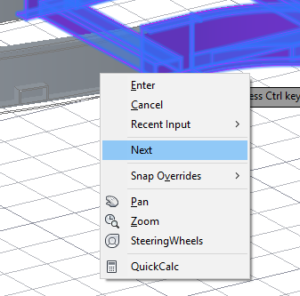
- If you want to turn in the opposite direction with a bend, just click with the right mouse button and hit next.
Enjoy this video with the basics!
Would you like to check my app?
Check it on the Autodesk App store: